The English Attack vs. Scheveningen Sicilian
1.e4 c5 2.Nf3 d6 3.d4 cxd4 4.Nxd4 Nf6 5.Nc3
The Scheveningen's famous 'small center' with ...e6 and ...d6 is flexible — but it has one drawback White can seize on immediately: nothing stops 6.g4!. This course teaches the most aggressive response to the Scheveningen, a direct pawn-storm attack (the celebrated Keres Attack idea) where White is often willing to sacrifice a piece to rip open the kingside.
Start the The English Attack vs. Scheveningen Sicilian course
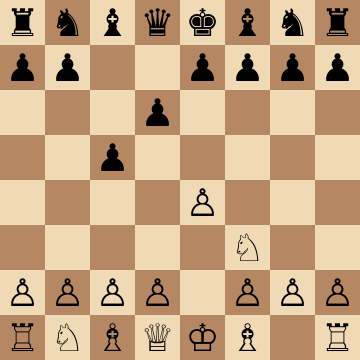
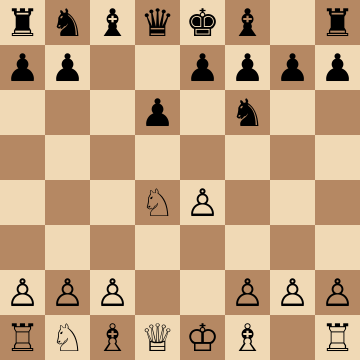
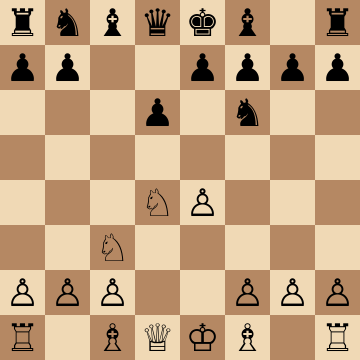
Mainline
1.e4 c5 2.Nf3 d6 3.d4 cxd4 4.Nxd4 Nf6 5.Nc3 e6 6.g4
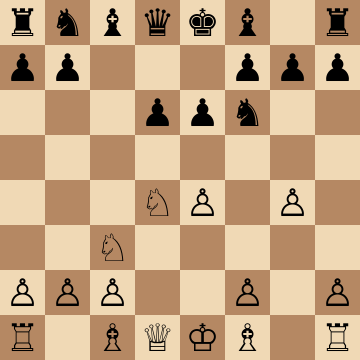
Keres Attack Main Line: 6...h6 7.h4
1.e4 c5 2.Nf3 d6 3.d4 cxd4 4.Nxd4 Nf6 5.Nc3 e6 6.g4 h6 7.h4 Nc6 8.Rg1 h5 9.gxh5 Nxh5 10.Bg5
Black's main brace against the storm: 6...h6 tries to slow g5, and White answers with the second wave 7.h4 and 8.Rg1. When Black blockades with 8...h5, the capture 9.gxh5 followed by 10.Bg5 leaves the h5-knight loose and the g-file half open — the rook already attacks down it without castling. White continues Be2, Qd2 and O-O-O with every piece pointed kingside. Black survives only with precision; one natural move too slow and the g-file decides.
Central Counter: 6...e5 7.Bb5+
1.e4 c5 2.Nf3 d6 3.d4 cxd4 4.Nxd4 Nf6 5.Nc3 e6 6.g4 e5 7.Bb5+ Bd7 8.Bxd7+ Qxd7 9.Nf5
Striking back in the center with 6...e5 is principled, but the zwischenzug 7.Bb5+ takes the sting out of it: after the trade on d7 the knight lands on f5, the best square on the board, soon supported by g5 kicking the f6-knight away. Black's d6-pawn is backward on a half-open file and the d5-square belongs to White for the rest of the game. Meet ...g6 with Ne3 heading for d5 — the structural concessions never go away.
6...Nc6 7.g5: the Space Clamp
1.e4 c5 2.Nf3 d6 3.d4 cxd4 4.Nxd4 Nf6 5.Nc3 e6 6.g4 Nc6 7.g5 Nd7 8.Be3 Be7 9.h4
When Black just develops, White takes everything on offer: 7.g5 evicts the knight to d7, and the follow-up Be3 with h4-h5 rolls forward gaining space on every move. Long castling comes next, and the attack often crashes through with g6 or a piece sacrifice on e6 once Black commits the king. If Black delays castling instead, White happily grabs more of the center with f4 and converts the space advantage slowly. Either way, White dictates.
Najdorf Hybrid: 6...a6 7.g5
1.e4 c5 2.Nf3 d6 3.d4 cxd4 4.Nxd4 Nf6 5.Nc3 e6 6.g4 a6 7.g5 Nfd7 8.h4 b5 9.a3 Bb7 10.Be3
Scheveningen players often mix in ...a6 hoping for a normal Sicilian race, so the course covers the hybrid battle: Black rushes ...b5 and ...Bb7 while White advances h4 and prepares Qd2 with long castling. The little move 9.a3 is worth its weight — it blunts ...b4 for a long time, buying the attack the tempo it needs. From here the thematic sacrifices on e6 and f5 appear whenever Black's pieces drift from the kingside defense; they are core curriculum, not footnotes.
Central Break: 8...d5 9.Bb5
1.e4 c5 2.Nf3 d6 3.d4 cxd4 4.Nxd4 Nf6 5.Nc3 e6 6.g4 h6 7.h4 Nc6 8.Rg1 d5 9.Bb5 Bd7 10.exd5 Nxd5 11.Nxd5 exd5
The freeing break 8...d5 is Black's most critical answer to the h4 setup, and the pin 9.Bb5! is White's best response — Black cannot resolve the center on his own terms. After the forced exchanges White plays Qe2+ and Be3 with long castling, blockading and besieging the isolated d5-pawn while the g4-pawn still cramps Black's kingside. Simplification has not bought safety: the structure is worse for Black and the initiative never changed hands.
Key ideas
- Strike with 6.g4 before Black completes development — the storm starts on move six.
- Chase the f6-knight with g5, then grab space and attacking lines with h4 and Rg1.
- Sacrifice material when the position demands it: the course shows which piece sacs win by force.
- Deny the Scheveningen its dream: the flexible setup never gets time to demonstrate its flexibility.
Typical plans and structures
After 6.g4, Black must react at once — 6...h6 braces against g5, 6...e5 strikes back in the center, 6...Nc6 continues developing — and each reply gets a dedicated attacking scheme: g5 advances, Be3 with Qd2 or Qf3 and long castling, rooks lifting via g1 or h3. The thematic piece sacrifices on b5, e6 and f5 are core curriculum, not exotic footnotes. When Black survives the opening, White's space advantage converts into a favorable middlegame anyway.
Who should play it
Uncompromising attackers who want the sharpest sound weapon against the Scheveningen structure and enjoy calculating forcing lines with material on the table.
Study the English Attack vs. Scheveningen Sicilian move by move
The first 3 lines of the interactive course, exactly as a signed-out visitor can play them — each move with the coaching note shown on the board.
Line 1 — the main line
1.e4 We claim the center. 1...c5 Our opponent opens from the flank. 2.Nf3 We develop a knight. 2...d6 Our opponent pushes a pawn to free their light squared bishop. 3.d4 We strike in the center to open lines. 3...cxd4 Accepting the trade. 4.Nxd4 We recapture, centralizing our knight. 4...Nf6 Attacking our pawn on e4. 5.Nc3 We protect with the knight. 5...a6 Preventing us from reaching the b5 square. 6.Be3 Developing the bishop and reinforcing the knight. 6...e6 Keeping a flexible pawn structure and making room for the f8 bishop. 7.g4 We launch a pawn storm on the kingside, aiming to attack with g5. 7...e5 Our opponent reacts in the center, pushing our knight away. 8.Nf5 We relocate the knight to a strong square, supported by our pawns. 8...g6 Challenging our knight. 9.g5 We respond with a counterattack, instead of retreating. 9...gxf5 Taking the piece, likely expecting a trade. 10.exf5 We give up material to increase pressure with pawns. 10...d5 Gaining space in the center instead of retreating to keep material advantage. 11.Qf3 We bring out the queen to clear the way for castling. 11...d4 Forking our pieces. 12.O-O-O We castle to activate our rook and pin their pawn. 12...Nbd7 Unpinning the pawn and reinforcing f6. 13.Bc4 We activate the bishop aiming at f7. 13...Qc7 Developing their queen and threatening the bishop. 14.Bxd4 We sacrifice another piece in order to break open their defenses and target their king. 14...exd4 Our opponent is forced to accept the sacrifice. 15.Rhe1+ We bring the rook into play by checking and forcing our opponent's king to move. 15...Kd8 Placing the king on a safer square but losing the right to castle. 16.Rxd4 We have a great initiative and control the central files.
Line 2 — punishing a blunder
1.e4 We claim the center. 1...c5 Our opponent opens from the flank. 2.Nf3 We develop a knight. 2...d6 Our opponent pushes a pawn to free their light squared bishop. 3.d4 We strike in the center to open lines. 3...cxd4 Accepting the trade. 4.Nxd4 We recapture, centralizing our knight. 4...Nf6 Attacking our pawn on e4. 5.Nc3 We protect with the knight. 5...a6 Preventing us from reaching the b5 square. 6.Be3 Developing the bishop and reinforcing the knight. 6...e6 Keeping a flexible pawn structure and making room for the f8 bishop. 7.g4 We launch a pawn storm on the kingside, aiming to attack with g5. 7...e5 Our opponent reacts in the center, pushing our knight away. 8.Nf5 We relocate the knight to a strong square, supported by our pawns. 8...g6 Challenging our knight. 9.g5 We respond with a counterattack, instead of retreating. 9...gxf5 Taking the piece, likely expecting a trade. 10.exf5 We give up material to increase pressure with pawns. 10...d5 Gaining space in the center instead of retreating to keep material advantage. 11.Qf3 We bring out the queen to clear the way for castling. 11...d4 Forking our pieces. 12.O-O-O We castle to activate our rook and pin their pawn. 12...Nbd7 Unpinning the pawn and reinforcing f6. 13.Bc4 We activate the bishop aiming at f7. 13...Be7?? Aiming to reinforce f6, but too slow as we can capture and jump into the center. 14.gxf6 We capture the knight, balancing material. 14...Nxf6 Recapturing but renewing the pin on d4. 15.Nd5 We centralize the knight to escape the fork and exploit the light square weaknesses. 15...Nxd5 Our opponent captures to relieve pressure. 16.Bxd5 We recapture, aiming at f7 with our bishop. 16...dxe3 Gaining a piece but opening the d file. 17.Bxf7+ We sacrifice the bishop, creating a double attack against their king and queen. 17...Kxf7 Our opponent takes the bishop, unable to save the queen. 18.Rxd8 We have a winning material advantage and a strong attack on their king.
Line 3 — the main line
1.e4 We claim the center. 1...c5 Our opponent opens from the flank. 2.Nf3 We develop a knight. 2...d6 Our opponent pushes a pawn to free their light squared bishop. 3.d4 We strike in the center to open lines. 3...cxd4 Accepting the trade. 4.Nxd4 We recapture, centralizing our knight. 4...Nf6 Attacking our pawn on e4. 5.Nc3 We protect with the knight. 5...a6 Preventing us from reaching the b5 square. 6.Be3 Developing the bishop and reinforcing the knight. 6...e6 Keeping a flexible pawn structure and making room for the f8 bishop. 7.g4 We launch a pawn storm on the kingside, aiming to attack with g5. 7...e5 Our opponent reacts in the center, pushing our knight away. 8.Nf5 We relocate the knight to a strong square, supported by our pawns. 8...g6 Challenging our knight. 9.g5 We respond with a counterattack, instead of retreating. 9...gxf5 Taking the piece, likely expecting a trade. 10.exf5 We give up material to increase pressure with pawns. 10...d5 Gaining space in the center instead of retreating to keep material advantage. 11.Qf3 We bring out the queen to clear the way for castling. 11...Ne4 Aiming to preserve material lead, but giving up central control. 12.Nxe4 We capture their knight, gaining a pawn and opening key files. 12...dxe4 Recapturing the piece. 13.Qxe4 We take the pawn and centralize the queen, targeting e5. 13...Nc6 Developing a knight and defending the pawn. 14.Bc4 We activate our bishop aiming at f7. 14...Qd7 Targeting f5 with their queen and bishop. 15.g6 We have a strong compensation thanks to our attack on f7 together with piece activity.
The free preview ends here — continue with all 11 lines in the interactive course, with instant feedback on every move you play.
Frequently asked questions
What is the Keres Attack against the Scheveningen?
It is the immediate 6.g4 after 1.e4 c5 2.Nf3 d6 3.d4 cxd4 4.Nxd4 Nf6 5.Nc3 e6, introduced by Paul Keres in 1943. It is considered so dangerous that most modern players reach the Scheveningen only through move orders that avoid it — a compliment this course converts into points.
Why is 6.g4 so strong against the ...e6 and ...d6 setup?
The small center means Black exerts no pressure on White's position yet — so the flank advance costs nothing. The g5 push then evicts the f6-knight, the defender of e4 and the kingside, and White gains a huge initiative with natural moves.
Are the piece sacrifices in these lines sound?
The main sacrifices — typically on e6, f5 or b5 — are established theory backed by engine analysis, not romantic hope. The course teaches the pattern recognition first: when the sacrifice is standard, when it needs exact preparation, and when to keep building instead.
Learn the English Attack vs. Scheveningen Sicilian with AI feedback
This page pairs the guide above with an interactive ChessMind AI course: a GM-authored repertoire you study move by move on a real board, then practice against a human-like chess AI opponent with instant feedback and spaced-repetition review, so the key positions actually stick. Start learning, jump straight into practice, or browse all opening courses.
New to a concept? Every term is defined in the chess terms glossary.