Beat the Grunfeld
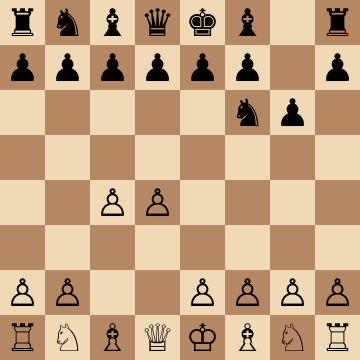
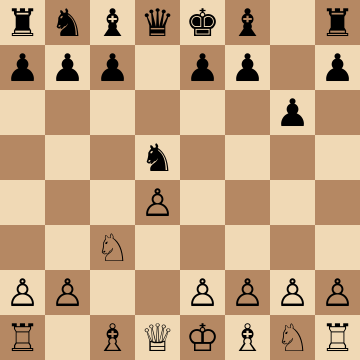
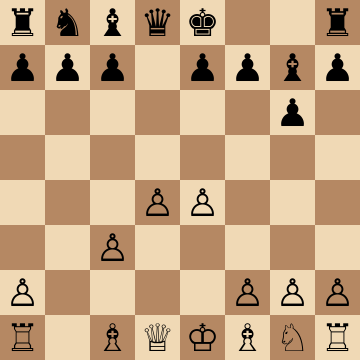
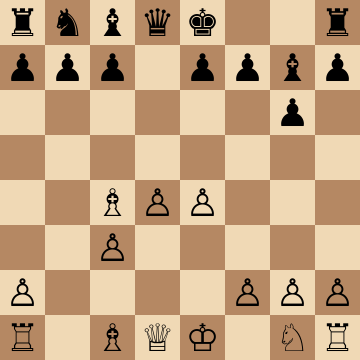
1.d4 Nf6 2.c4 g6 3.Nc3 d5 4.cxd5 Nxd5 5.e4 Nxc3 6.bxc3 Bg7 7.Bc4
The Grunfeld invites White to build a big center and then attacks it — so this course teaches the classical Exchange setup with 7.Bc4: keep the center, develop behind it with Ne2 and Be3, and point the light-squared bishop straight at Black's king. Kasparov's own favorite weapon from the White side.
Mainline
1.d4 Nf6 2.c4 g6 3.Nc3 d5 4.cxd5 Nxd5 5.e4 Nxc3 6.bxc3 Bg7 7.Bc4 c5 8.Ne2 Nc6 9.Be3 O-O 10.O-O
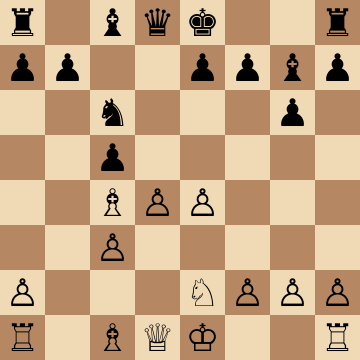
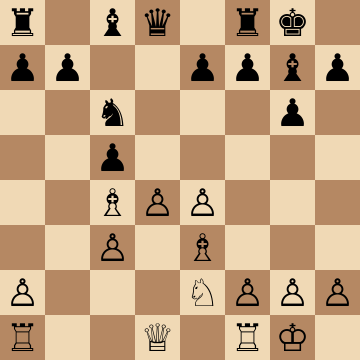
Classical Main Line: 14.d5!
1.d4 Nf6 2.c4 g6 3.Nc3 d5 4.cxd5 Nxd5 5.e4 Nxc3 6.bxc3 Bg7 7.Bc4 c5 8.Ne2 Nc6 9.Be3 O-O 10.O-O Bg4 11.f3 Na5 12.Bd3 cxd4 13.cxd4 Be6 14.d5
The critical position of the whole 7.Bc4 system. Black's standard pressure — ...Bg4, ...Na5, exchanges on d4 — meets its answer in 14.d5!: the center advances at the exact moment Black's pieces committed to attacking it. The e6 bishop must retreat, the a5 knight is stranded on the rim, and White's central mass rolls forward supported by both bishops. Kasparov defended Black's side of this at the highest level and still suffered; club players collapse far faster.
Seville Variation: 12.Bxf7+!?
1.d4 Nf6 2.c4 g6 3.Nc3 d5 4.cxd5 Nxd5 5.e4 Nxc3 6.bxc3 Bg7 7.Bc4 c5 8.Ne2 Nc6 9.Be3 O-O 10.O-O Bg4 11.f3 Na5 12.Bxf7+ Rxf7 13.fxg4 Rxf1+ 14.Kxf1
Made famous in the Karpov-Kasparov Seville match of 1987: instead of retreating from ...Na5, White simply takes on f7! The point is concrete — after 12...Rxf7 13.fxg4, White has won a pawn and shattered Black's coordination, since the a5 knight and g7 bishop both sit far from the action. Black gets long-term pressure against White's pawn islands as compensation. A perfect surprise weapon: your opponent must find precise moves in a position you chose to study.
Exchange Grab: 14...Bxa1 15.Qxa1
1.d4 Nf6 2.c4 g6 3.Nc3 d5 4.cxd5 Nxd5 5.e4 Nxc3 6.bxc3 Bg7 7.Bc4 c5 8.Ne2 O-O 9.O-O Nc6 10.Be3 Bg4 11.f3 Na5 12.Bd3 cxd4 13.cxd4 Be6 14.d5 Bxa1 15.Qxa1 f6 16.Bh6
When 14.d5 lands, greedy opponents grab the a1 rook — and hand White a dream attack. After 15.Qxa1 the queen sits monstrously on the long diagonal, 15...f6 is forced to block it, and 16.Bh6 wins the exchange right back with interest: Black's king has lost its shield and its best defender. Every practical result favors White here — the engine's cold equality never survives contact with a human defending this position over the board.
5...Nb6 Sideline: Keeping the Big Center
1.d4 Nf6 2.c4 g6 3.Nc3 d5 4.cxd5 Nxd5 5.e4 Nb6 6.Be3 Bg7 7.Nf3 O-O 8.Be2
Retreating with 5...Nb6 avoids the main-line trades but leaves White's center completely unchallenged. Develop with healthy moves — Be3, Nf3, Be2, O-O — and meet ...Nc6 or ...Bg4 pressure with the d5 advance at the right moment. Black's knight on b6 controls nothing central and often takes three more moves to re-enter the game. The strategic verdict is simple: without ...Nxc3 damaging White's structure, the Grunfeld's whole counterattacking machinery is missing a gear.
10...Qc7 Setup: Pressure Down the c-File
1.d4 Nf6 2.c4 g6 3.Nc3 d5 4.cxd5 Nxd5 5.e4 Nxc3 6.bxc3 Bg7 7.Bc4 c5 8.Ne2 Nc6 9.Be3 O-O 10.O-O Qc7 11.Rc1 Rd8
A quieter but venomous Black system: the queen slides to c7 and the rook to d8, keeping maximum pressure on d4 without committing the light-squared bishop. White's answer is prophylaxis first — 11.Rc1 overprotects the c3-square and unpins ideas along the c-file — followed by the standard regrouping with Qd2, Rfd1 or the kick h3 and f4. Hold the center calmly and Black runs out of pressure moves; then d5 or f4-f5 arrives with full force.
Key ideas
- Take the full center with 5.e4 and defend it properly — cxd5 and bxc3 give you the pawns to do it.
- Play 7.Bc4 with Ne2: the knight avoids the ...Bg4 pin and the bishop eyes f7 for the whole game.
- Meet the thematic ...c5 and ...Qa5 pressure with confident, well-rehearsed piece play.
- Convert the center into attack: d5 breaks and kingside expansion flow naturally once Black's pressure is contained.
Typical plans and structures
White completes the classical setup — Bc4, Ne2, Be3, O-O, often Rc1 or Qd2 — and then chooses: the space-gaining d5 advance when Black's pressure on d4 slackens, or a direct kingside initiative with f4-f5 and Bh6. Black's counterplay lives on the c- and d-files and the long diagonal; the course drills the exact move orders that keep d4 defended without concessions. When the center holds, White's extra space decides the game.
Who should play it
1.d4 players who refuse to be bluffed out of the center and want a classical, principled recipe against one of Black's most dynamic defenses.
Study Beat the Grunfeld move by move
The first 3 lines of the interactive course, exactly as a signed-out visitor can play them — each move with the coaching note shown on the board.
Line 1 — the main line
1.d4 We claim the center. 1...Nf6 Our opponent develops their knight to prevent e2 e4. 2.c4 We expand on the queenside. 2...g6 Preparing to fianchetto. 3.Nc3 We bring out the knight, aiming for e2 e4. 3...d5 Our opponent breaks in the center, entering the Grunfeld Defense! 4.cxd5 We trade pawns on d5. 4...Nxd5 Our opponent takes back with the knight. 5.e4 We launch the e pawn, attacking their knight while gaining space. 5...Nxc3 Our opponent trades on c3. 6.bxc3 We take back with the pawn. 6...Bg7 Our opponent plans to undermine our center coordinating this bishop with a pawn break on c5. 7.Bc4 We develop the bishop aiming at f7. 7...c5 Challenging our center. 8.Ne2 We bring out the knight, reinforcing d4. 8...Nc6 Increasing pressure in the center. 9.Be3 We bring the bishop to defend d4. 9...O-O Our opponent castles. 10.O-O We castle too. 10...Qc7 Activating the queen and freeing d8 for the rook. 11.Rc1 We bring the rook to the c file, X-raying their queen. 11...Rd8 Our opponent activates the rook along the d file. 12.h4! We advance the h pawn to apply pressure and create kingside weaknesses. 12...e6 Limiting our bishop. 13.h5 We break on h5. 13...Ne5 Exploiting the pin on d4 to centralize the knight and target our bishop. 14.Bf4 We pin their knight. 14...Qe7 Our opponent respositions the queen. 15.Bb3 We pull the bishop back to safety, dominating the centet and with great pressure on the kingside.
Line 2 — against an inaccuracy
1.d4 We claim the center. 1...Nf6 Our opponent develops their knight to prevent e2 e4. 2.c4 We expand on the queenside. 2...g6 Preparing to fianchetto. 3.Nc3 We bring out the knight, aiming for e2 e4. 3...d5 Our opponent breaks in the center, entering the Grunfeld Defense! 4.cxd5 We trade pawns on d5. 4...Nxd5 Our opponent takes back with the knight. 5.e4 We launch the e pawn, attacking their knight while gaining space. 5...Nxc3 Our opponent trades on c3. 6.bxc3 We take back with the pawn. 6...Bg7 Our opponent plans to undermine our center coordinating this bishop with a pawn break on c5. 7.Bc4 We develop the bishop aiming at f7. 7...c5 Challenging our center. 8.Ne2 We bring out the knight, reinforcing d4. 8...Nc6 Increasing pressure in the center. 9.Be3 We bring the bishop to defend d4. 9...O-O Our opponent castles. 10.O-O We castle too. 10...Qc7 Activating the queen and freeing d8 for the rook. 11.Rc1 We bring the rook to the c file, X-raying their queen. 11...Rd8 Our opponent activates the rook along the d file. 12.h4! We advance the h pawn to apply pressure and create kingside weaknesses. 12...Qa5 Our opponent activates the queen. 13.Qb3 We develop the queen as well, coordinating with the bishop to target f7. 13...e6 Our opponent blocks the diagonal. 14.Bg5 We reposition the bishop to target their rook. 14...Re8 Our opponent has to move the rook. 15.e5 We gain central space and restrict our opponent's pieces.
Line 3 — against an inaccuracy
1.d4 We claim the center. 1...Nf6 Our opponent develops their knight to prevent e2 e4. 2.c4 We expand on the queenside. 2...g6 Preparing to fianchetto. 3.Nc3 We bring out the knight, aiming for e2 e4. 3...d5 Our opponent breaks in the center, entering the Grunfeld Defense! 4.cxd5 We trade pawns on d5. 4...Nxd5 Our opponent takes back with the knight. 5.e4 We launch the e pawn, attacking their knight while gaining space. 5...Nxc3 Our opponent trades on c3. 6.bxc3 We take back with the pawn. 6...Bg7 Our opponent plans to undermine our center coordinating this bishop with a pawn break on c5. 7.Bc4 We develop the bishop aiming at f7. 7...c5 Challenging our center. 8.Ne2 We bring out the knight, reinforcing d4. 8...Nc6 Increasing pressure in the center. 9.Be3 We bring the bishop to defend d4. 9...O-O Our opponent castles. 10.O-O We castle too. 10...Qc7 Activating the queen and freeing d8 for the rook. 11.Rc1 We bring the rook to the c file, X-raying their queen. 11...b6 Our opponent prepares to fianchetto. 12.h4 We launch the h pawn, aiming to open lines on the kingside. 12...Bb7 Our opponent continues developing. 13.h5 We break on h5. 13...Rad8 Our opponent brings their rook to the d file. 14.h6 We push the pawn, threatening the bishop and compromising our opponent's structure. 14...Bf6 Our opponent repositions the bishop. 15.Nf4 We reroute the knight to the kingside, giving up the d4 pawn for attacking chances like Nf4 e6! and Qd2 g4.
The free preview ends here — continue with all 15 lines in the interactive course, with instant feedback on every move you play.
Frequently asked questions
Why is 7.Bc4 a good way to meet the Grunfeld?
It is the classical main line: the bishop takes the a2-g8 diagonal before Black can blunt it, the knight develops to e2 so ...Bg4 has no target, and White keeps maximum flexibility for the d5 break. Generations of world champions — Kasparov above all — trusted exactly this setup.
Isn't the big center a liability against the Grunfeld?
Only when it is defended carelessly — which is precisely what Grunfeld players hope for. With the right piece placement the center is an asset that cramps Black and launches the attack; the course focuses on the handful of critical moments where the defense of d4 must be exact.
What is Black's most testing continuation?
The main line runs 7...c5 8.Ne2 Nc6 9.Be3 O-O 10.O-O with heavy pressure on d4 — including the sharp ...Bg4 and ...Qa5 ideas and the endgames after ...cxd4. The course covers each branch with a clear evaluation and plan.
Learn Beat the Grunfeld with AI feedback
This page pairs the guide above with an interactive ChessMind AI course: a GM-authored repertoire you study move by move on a real board, then practice against a human-like chess AI opponent with instant feedback and spaced-repetition review, so the key positions actually stick. Start learning, jump straight into practice, or browse all opening courses.
New to a concept? Every term is defined in the chess terms glossary.