Attacking the Kalashnikov Sicilian
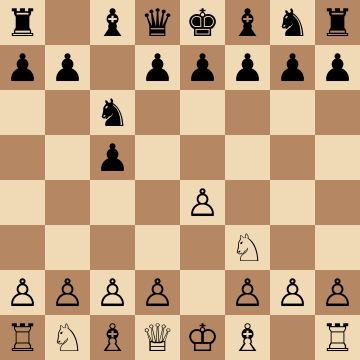
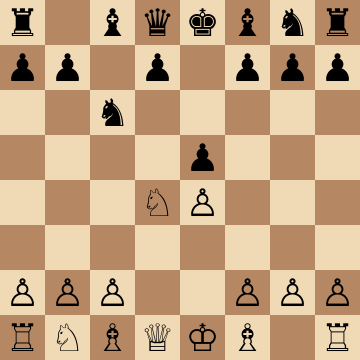
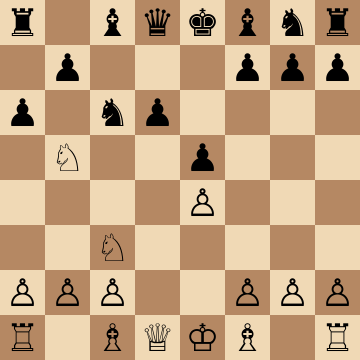
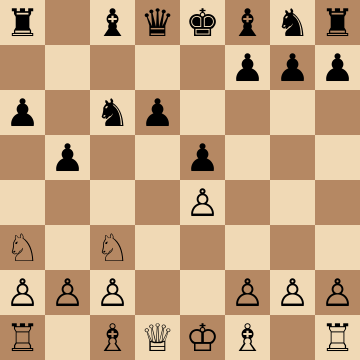
1.e4 c5 2.Nf3 Nc6 3.d4 cxd4 4.Nxd4 e5 5.Nb5 d6 6.N1c3 a6 7.Na3 b5
The Kalashnikov (1.e4 c5 2.Nf3 Nc6 3.d4 cxd4 4.Nxd4 e5) is the Sveshnikov's poisonous younger cousin — less studied, just as venomous. This course meets it with the principled 6.c4 setup: White clamps the d5-square, contains Black's dynamism, and keeps a stable structural pull without fearing the sharp tries.
Mainline
1.e4 c5 2.Nf3 Nc6 3.d4 cxd4 4.Nxd4 e5 5.Nb5 d6 6.N1c3 a6 7.Na3 b5
Main Line 8...f5 9.exf5
1.e4 c5 2.Nf3 Nc6 3.d4 cxd4 4.Nxd4 e5 5.Nb5 d6 6.c4 Be7 7.N1c3 a6 8.Na3 f5 9.exf5 Bxf5 10.Bd3
The ...f5 break is the Kalashnikov's signature bid for activity, and meeting it correctly is the heart of White's repertoire. Capturing with 9.exf5 keeps the d5-square firmly in White's hands, and 10.Bd3 challenges the active bishop immediately. After trades White aims a knight at d5, castles, and plays against the backward d6-pawn — Black's kingside gestures fade while the structural defects remain permanent.
Positional Line: 8...Nf6 9.Be2 O-O
1.e4 c5 2.Nf3 Nc6 3.d4 cxd4 4.Nxd4 e5 5.Nb5 d6 6.c4 Be7 7.N1c3 a6 8.Na3 Nf6 9.Be2 O-O 10.O-O Be6 11.Nd5
When Black develops normally, White gets the strategic dream: 11.Nd5 plants the knight on the hole Black created with 4...e5. If Black trades on d5, recapturing with the c-pawn opens the c-file and fixes d6 as a lifelong weakness; if not, White reroutes the a3-knight via c2 to e3 to reinforce the grip. Slow, methodical, and deeply unpleasant for Black — exactly what the Kalashnikov player hoped to avoid.
The Nc2 Regroup vs 8...Be6
1.e4 c5 2.Nf3 Nc6 3.d4 cxd4 4.Nxd4 e5 5.Nb5 d6 6.c4 Be7 7.N1c3 a6 8.Na3 Be6 9.Nc2 Nf6 10.Be2 O-O 11.O-O
Against ...Be6 setups the a3-knight shows its route: 9.Nc2 heads for e3, from where it eyes d5 and f5 and supports the b4 expansion. White castles, places rooks on b1 or c1, and rolls the queenside with b4-b5 while the d5-square stays untouchable. The instructive point is unhurried play — Black's position contains no active plan once ...f5 is neutralized, so White improves every piece before opening lines.
Refuting 5...a6? with 6.Nd6+
1.e4 c5 2.Nf3 Nc6 3.d4 cxd4 4.Nxd4 e5 5.Nb5 a6 6.Nd6+ Bxd6 7.Qxd6 Qf6 8.Qxf6 Nxf6 9.Nc3
Plenty of club players try to evict the b5-knight immediately with 5...a6?, forgetting the point of 5...d6. The punishment is thematic: 6.Nd6+! forces Black to surrender the dark-squared bishop, and after 7.Qxd6 Qf6 8.Qxf6 Nxf6 9.Nc3 White enjoys the bishop pair, total control of d5, and a clean structure — a riskless advantage straight from the opening. Know this sequence; it appears constantly at fast time controls.
8...Be6 9.Nc2 Bg5 Bishop Trade
1.e4 c5 2.Nf3 Nc6 3.d4 cxd4 4.Nxd4 e5 5.Nb5 d6 6.c4 Be7 7.N1c3 a6 8.Na3 Be6 9.Nc2 Bg5 10.Be2 Bxc1 11.Rxc1 Nf6 12.O-O O-O
A cunning Kalashnikov idea: Black offers to trade dark-squared bishops with ...Bg5, reasoning that his own bishop is bad behind the e5-pawn. Allow it calmly — after 10...Bxc1 11.Rxc1 the d5-hole has not moved, and the half-open c-file plus b4-b5 expansion give White the only plan on the board. The rook already stands perfectly on c1; a knight lands on d5, and Black defends passively for the rest of the game.
Key ideas
- Answer 5...d6 with 6.c4, seizing d5 and steering the game toward a favorable Maroczy-style bind.
- Exploit the permanent hole on d5 — a knight landing there often decides the strategic battle.
- Restrain Black's thematic ...f5 and ...b5 breaks before they generate real counterplay.
- Keep sharp lines in reserve: when Black overreaches, concrete play secures the advantage.
Typical plans and structures
White develops with N1c3 and Na3-c2 (rerouting the b5-knight), Be2, O-O and Be3, then decides between pressure on d6 down the d-file and queenside expansion with b4. The d5-square is the story of the game: White fights to occupy it with a knight while keeping Black's ...f5 break under control with well-timed f3 or exf5 decisions. The course also covers Black's gambit tries and move-order tricks, which are the Kalashnikov's real teeth.
Who should play it
1.e4 players who want a clear, structure-based recipe against the ...e5 Sicilians and prefer strategic domination with tactical alertness over forced razor-sharp duels.
Frequently asked questions
What is the difference between the Kalashnikov and the Sveshnikov?
In the Kalashnikov Black plays ...e5 on move four, before developing the g8-knight; in the Sveshnikov it comes after ...Nf6 and Nc3. The Kalashnikov keeps extra flexibility — which is why White's setup here, with an early c4, is chosen to work specifically against Black's move order.
Why is 6.c4 a strong answer to the Kalashnikov?
It stakes out d5 permanently: with pawns on c4 and e4, Black's freeing breaks are much harder to achieve, and the backward d6-pawn becomes a lasting target. Black's compensation — dynamic piece play — needs open lines that this structure denies.
Is the Kalashnikov dangerous for White?
Unprepared, yes — its tricks and gambit continuations catch many players. But its theory is far smaller than the Sveshnikov's, so a focused course covering the critical lines turns it from a scary surprise into a welcome sight.
Learn Attacking the Kalashnikov Sicilian with AI feedback
This page pairs the guide above with an interactive ChessMind AI course: a GM-authored repertoire you study move by move on a real board, then practice against a human-like chess AI opponent with instant feedback and spaced-repetition review, so the key positions actually stick. Start learning, jump straight into practice, or browse all opening courses.
New to a concept? Every term is defined in the chess terms glossary.